Saturday 5 August 2017

The First Step in my bike Restoration - Stripping the brooks saddle &


Having a quick peek at the brooks saddle I saw plenty of surface rust etc.. on the springs so I decided I would start there and strip it down.  The intention being to soak the parts in oxalic acid to remove the rust, then clean and decide if they should be re-chromed.

Surface Rust

Not looking so good

Seat off and view from the bottom

checking out how it goes together
 Notice the screws at the top, I decided straight away not to try and just unscrew them, I soaked the whole assembly in GT85 and left it to penetrate.   Getting to the bolts underneath looked a challenge but it wasn't too bad in the end.


looking down the saddle at a single bolt
 That bolt at the end looked difficult to get too, not much room for a spanner.

Stem and mounts removed

Spring removal
 This proved less than the challenge I expected, GT85 had done it's work and I used the spanner to do the work not the screw so it stayed in good condition.

 It might seem obvious but I took a photo of the saddle hooks to make sure I put them back on the right way up.
Springs
 Look at those springs all still in good condition no breaks and that nut at the end looks clean so may be easier to remove!  In the end it was easy to move that nut but very slow as I could only get it about a 1/4 turn at a time due to the clearance.
Rails
 Rails removed seem in good condition but don't know what the chrome at the ends will come out like.


All Stripped

All parts bagged and labled
 I bagged and labeled the parts, being thorough I wanted the left spring to go back on the left side etc..

Notice the saddle it is actually green but looks black due to grime and possibly the wax/leather care that has previously been used on it.  I will ask on the forum if anyone has any ideas about bringing the colour back out.
Pics of the bell stripped off

the top bell badge removed
 I love this bell it works and sounds great but needs rechroming to bring it backs to it's former glory.   I am pretty sure I can bring those grips back up to bright and shiny, surprisingly they came off fairly easily.
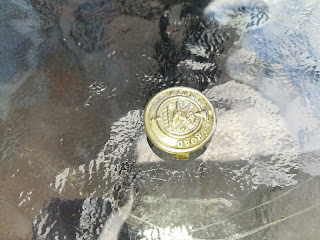
This is the badge from the top of the bell, they don't make them like this anymore...  I am going to make sure a good job is done on this.

Thursday 29 June 2017

Lacing a brooks saddle

My brooks like others I have seen on the web seems to be sagging a little and more to one side so I decided to lace it.  After trying with the laces and some of the patterns online I was disatisfied with the finish and the results in terms of firming up the saddle.

I got hold of some orange paracord and a rope tensioner from an old tent and did it all in one, here's the result hope you find my approach useful.


Trelock LS950 - Long term review and great company

The Trelock LS950 has been my goto front light for a while now, with it's lcd readout telling me how long I have left in power and it's adjustable power setting letting me go 47hrs on low power (still great for night riding) it has been hard to find fault.


It may be a little on the heavy side but it's positves and reliability have really made up for that.  The only failure I have had is the little rubber cover that protects the usb charging port came away due to my clumsy hands and a little too much force, completely my fault.

So after a year or so use it still retains it's charge and has been bashed rained on and still works as good as new.

So why did I choose this one over a dynamo light, well my setup puts all my charge into a 26000 Mah battery that is pre-charged before a tour, so it makes sure all my pedaling power goes into the powerbank squeezing every last ounce and starting with a 26000 Mah headstart means it's easy to recharge anything I want and haven't even come close to running out on a tour, and this light with it's own batter gives me another 47hr headstart.

I should also mention that when I broke the little rubber bit, I sent a request to the manufacturer to purchase a replacement and they came straight back asking for my address so they could ship one for free!!! how is that for customer service, they turned up a few days later but two of them just in case!!!

Montane customer service could learn a thing or two from Treelock!!

If your thinking of a USB front light, want it bright reliable and able to see you through a few days night riding you can't go wrong, it's solid strong and well made!!

Thursday 1 June 2017

Montane Deep Heat Sleeping Bag - Don't expect any help from Montane!!

For my winter trip I bought a Montane Deep Heat sleeping bag, really excited to get it however in use I found it too constrictive.  I am very broad and just couldn't move or properly get comfortable.

So I contacted Montane support and asked if they supplied and expanda similar to those offered by other manufacturers.  Simple reply was no.....

 Not to be put off I am used to "modifying" things so I sent a polite ask to them again explaining my problem and asking if they could supply me with some material, I could then match the zips and make my own..

The response I got was - we don't keep enough material to help you out..............   Needless to say I am not impressed.  I let them know and I am writing this as a heads up for anyone thinking of buying Montane products, don't expect anything in the way of support from them unless it's standard stuff. 

I don't believe for one minute they can't get hold of a piece of their material, I believe simply that they can't be bothered as a single customer is just not worth the effort and their customer support don't consider going a little out of their way as worth their time.

Contrast that with companies like "avenir" who sent me replacemnt parts twice free of charge after I lost them....  Or Specialized who paid for an entirely new wheelset after my hubs failed on one of their bikes after  a years use... those are companies who believe their reputation and customers are worth making an effort for.

Perhaps if I was doing a high profile expedition or a large customer I would have had a better response...

For the price of the Bag I expect more support from the company - I deal a lot with support contracts in my day job and one of the first things I state when negotiating or during support reviews is that I don't measure a company by them doing their job, my standard of excellence is when things go wrong how far they are prepared to go to put things right and demonstrate their commitment to "excellent customer support". 

I am not saying they are responsible for my wide shoulders or their bag was wrong, I am saying that stating their commitment to excellence should mean more than accurate manufacturing, it's being responsive to their customers regardless of the size of the order.

Well I have learned my lesson with them and this will be my first and last purchase.

I have purchased a "Snugpak" expander panel and if I can match the zips I will use that, not the perfect solution but better than Montane's "Nothing".


Sunday 23 April 2017

Ortlieb Ultimate 6 Pro E Handlebar Bag + RAV Power + E-WERK ultimate touring power setup??

Short Review

I have had this bag for about 3 months now, it has been out in all weathers day and night and it doesn't show any sign of issues.

The BAG


I already have the ortlieb 6 bag but bought this one so that I could simplify my bike setup.  I know store my Busch & Mueller e-werk in the bag connected to a massive 26000Mah battery that allows you to charge and discharge at the same time.

What this means is that in the last 3 months of using it I have been able to run

1. Bike Sat Nav (Garmin Edge Touring Plus), 
2.  Action camera (Garmin Virb XE)
3. Touring tablet (Android) 
4. Phone (samsung galaxy)
5. Front light (Trelok 950) USB rechargeable (low power is still bright gives 47hrs high power = 7hrs) - also precharged before I leave
6 Rear Light (USB)
7. My mate occasionally cadging a free charge

all kept fully charged.  

I charged the battery up once before when I fitted it to the bike and last I checked it was still showing a full charge thanks to being constantly charged whilst I am cycling.

I mentioned this on the forums and had some biteback about loss of effort due to storing in a battery etc.. then charging the onboard batteries of the devices.  However, I pointed out "this is a 26000Mah" battery pre charged so way more than I am losing with the setup.


For it's size it is very light, with a single power input and 3 x outputs all capable of 2.1a I don't need to worry about being caught short on power.

Keeping the battery and the E-werk in the bag means I don't get rusty connectors, the battery is protected from the elements along with the e-werk. 

I only have one cable going to the dynamo from the mount, no more running a cable to the front light (switched to usb charged) which I prefer and during a long tour far easier to get a replacement light I would imagine and less fettling trying to rewire one (imho)

If I need to charge the Sat Nav or camera during the day I connect a cable and run it into the bag simple!

All in all I can't imagine a better setup for myself - and for long tours it is excellent.

Sunday 22 January 2017

Light mount adapter for rear racks


While busily studying away for a security exam I came up with the following, it's a short post and I will do a longer one when I refine the idea.

I am doing away with my dynamo lights and going usb rechargeable letting the dynamo permanently charge a 26000Mah battery that charges the usb lights during the day.  The most frustrating part is finding the usb light I want that fits a rear rack mount so this afternoon I made this in my shed.  I am calling it version one as a proof of concept.  It works really well, costs basically nothing and I know I can make it smaller. 

What do you think and any ideas:

Parts, a piece of plastic water tubing, some reflective tape, two bolts and some spacers.   The only work was cut off the required length of pipe, drill four holes, 2 for the bolts smaller than the head size to larger holes directly opposite to allow for a screwdriver/allen key to tighten. 

Two bolts attach to the frame

A light I had lying around mounted securely

Rear Shot of the mount

Mounted Front View

Mounted top view showing spacers to allow
the rubber ring mount to pass through